Flask setup for production
I use here domain name iocafecloud.com, replace it with your domain name. In practise, you need domain name, numeric IP alone will not work. The domain name needs to be registered with someone (godaddy, etc) and set to point numeric IP address of your cloud server.
Install ubuntu components
sudo apt update
sudo apt install python3-pip python3-dev build-essential
sudo apt install libssl-dev libffi-dev python3-setuptools
sudo apt install libgl1-mesa-glx libegl1-mesa libxrandr2 libxrandr2 libxss1
sudo apt install libxcursor1 libxcomposite1 libasound2 libxi6 libxtst6
sudo apt install nginx
Setup and commands for nginx and ufw
The nginx is web server, like Apace. It listens socket ports 80 and 443 (secure) and processes HTTP requests from web browser.
Ufw is firewall, which is needed for security. The ufw is used to select which programs (TCP/UDP ports) can be accessed from network.
Enable and disable effect wether nginx is started at boot
/coderoot/iocom/scripts/ufw-cloud-firewall.sh
sudo ufw allow 'Nginx HTTP'
sudo ufw allow 'Nginx HTTPS'
sudo ufw status
sudo systemctl start nginx
sudo systemctl restart nginx
sudo systemctl stop nginx
systemctl status nginx
sudo systemctl enable nginx
sudo systemctl disable nginx
Install anaconda
Anaconda is tool for managing virtual Python environments.
You may need to change version number, see https://www.anaconda.com/products/individual#linux for the latest.
I needed to restart bash to get path set
If you are using iocafe virtual machine, it should anaconda should be readily installed.
wget https://repo.anaconda.com/archive/Anaconda3-2020.02-Linux-x86_64.sh -O ~/anaconda.sh
bash ~/anaconda.sh
conda update conda
Setup virtual environment for running flask
Notice that current virtual environment is displayed in terminal like flask in “(flask) john@iocafe:/coderoot/iocom/extensions/iocloud$”. “(base)” indicates when you are in computers base conda connection.
“conda deactivate” is to deactivates the virtual machine, If you have a virtual machine activated, something else than (base) deactivate it first.
conda create -n flask python=3.7 anaconda
conda activate flask
pip install wheel
pip install gunicorn flask
Create file icloud.service to
sudo nano /etc/systemd/system/iocloud.service
With contents:
You may need to change user name
Notice that myproject.sock is created automatically, no action needed to create it
[Unit]
Description=Gunicorn instance to serve iocloud
After=network.target

[Service]
User=john
Group=www-data
WorkingDirectory=/coderoot/iocom/extensions/iocloud
Environment="PATH=/home/john/anaconda3/envs/flask/bin"
ExecStart=/home/john/anaconda3/envs/flask/bin/gunicorn --workers 3 --bind unix:myproject.sock -m 007 wsgi:app

[Install]
WantedBy=multi-user.target
Setup available nginx site
sudo nano /etc/nginx/sites-available/iocloud
Content for /etc/nginx/sites-available/iocloud for testing in own virtual machine
server {
    listen 80;
    server_name _;

    location / {
        include proxy_params;
        proxy_pass http://unix:/coderoot/iocom/extensions/iocloud/myproject.sock;
    }
}
Content for /etc/nginx/sites-available/iocloud which actually worked in web server. 443/sll rows were automatically added by Certbot configuration.
server {
    listen 80;
    server_name iocafecloud.com www.iocafecloud.com;
    root /coderoot/iocom/extensions/iocloud;

    location / {
        include proxy_params;
        proxy_pass http://unix:/coderoot/iocom/extensions/iocloud/myproject.sock;
    }

    listen 443 ssl; # managed by Certbot
    ssl_certificate /etc/letsencrypt/live/iocafecloud.com/fullchain.pem; # managed by Certbot
    ssl_certificate_key /etc/letsencrypt/live/iocafecloud.com/privkey.pem; # managed by Certbot
    include /etc/letsencrypt/options-ssl-nginx.conf; # managed by Certbot
    ssl_dhparam /etc/letsencrypt/ssl-dhparams.pem; # managed by Certbot
}
Enable it
Enable = Link the file to the sites-enabled directory to enable this:
sudo ln -s /etc/nginx/sites-available/iocloud /etc/nginx/sites-enabled
Starting and stopping
sudo systemctl start iocloud
sudo systemctl stop iocloud
sudo systemctl status iocloud
sudo systemctl enable iocloud
sudo systemctl disable iocloud
Testing without domain name (skip on real web server)
I needed to disable default nginx site to use always flask regardless of URL
Without this gninx complains: Job for nginx.service failed because the control process exited with error code. See “systemctl status nginx.service” and “journalctl -xe” for details.
cd /etc/nginx/sites-enabled
sudo rm default
sudo systemctl restart nginx
To get “default” back:
sudo ln -s /etc/nginx/sites-available/default /etc/nginx/sites-enabled
Serve Certificate
HTTPS server heeds a certificate (a file) from a CA (certificate authority). https://letsencrypt.org is a free CA. We get certificate from let’s encrypt by running Certbot ACME software on our web server. This proves that we are in control of the web site.
Add Certbot PPA
sudo apt-get update
sudo apt-get install software-properties-common
sudo add-apt-repository universe
sudo add-apt-repository ppa:certbot/certbot
sudo apt-get update
sudo apt-get install certbot python3-certbot-nginx
Configure nginx
Have Certbot edit your Nginx configuration automatically to serve it, turning on HTTPS access in a single step.
This needs real Web server with domain name, with HTTP. See certbot instructions.
sudo certbot --nginx
Select virtual environment in VS Code
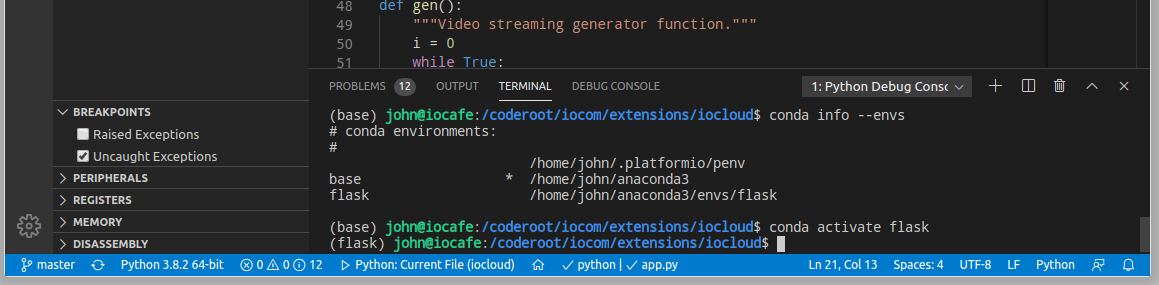
type “conda activate flask”, etc. in VS code terminal.
Links
https://www.digitalocean.com/community/tutorials/how-to-serve-flask-applications-with-gunicorn-and-nginx-on-ubuntu-18-04 https://certbot.eff.org/lets-encrypt/ubuntubionic-nginx
24.5.2020/pekka